Pages

Wednesday, May 16, 2012

Ashley - Rocket Baby Quilt

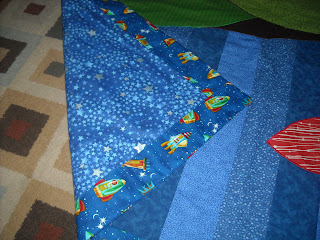
Hey there everyone! It's been too long I know, my friend invited my daughter and I to go with her back to her home in Massachusetts for the week since our husbands were in the field and so we loaded up the kiddos and went :) Very beautiful up there, it reminds me of my home Oregon. Anyhow you know how I was talking of another friend who was having a baby well I'm a bum and didn't get it done in time but I'm glad that I didn't rush this project because it was a bunch of work and my first time doing applique BUT all that aside I think it turned out beautiful, take a look and tell me what you think.


The back fabric is stars :)


This little boy wasn't a part of my original design. When I was cutting away the stabilizer on the back I accidentally cut the fabric and made a hole. At first I was DEVESTATED but with a little creative thinking I was able to cover it up, and I really like the little boy standing there.


Like I said a very big project but I love how it came out. Keep crafting and check back soon! Pin It

Friday, May 11, 2012

Alisha - Teacher Appreciation Cake


This week was teacher teacher appreciation week and parent conferences. Blake has grown leaps and bounds in his kindergarten class and I think part of that is due to his teacher. We found out yesterday that Blake is ready for 1st grade and already reading at the 1st grade level! I couldn't be more proud of my son and hope he continues this progress as he progresses through school.

Anyway, enough gloating and on with the post :) I wanted to get his teacher something unique but also useful. I figured at this point in the school year the class might be running low on school supplies but how could I give supplies in fun and unique way? After I surfed around Pinterest I decided it must be in the form of a teacher supply cake! This is how mine turned out:


I was able to squeeze facial tissue, glue sticks, liquid glue, crayons, a storage box, wall border and other wall decorations, pencils, post it note pads, hand sanitizer, and pipe cleaners on it! All for around $40, if I make one for Blake's 1st grade teacher next year I'll be sure to buy extra when school supplies go on sale in the summer - it would be even cheaper then! Want to make one for your teacher?

Here is the supply list:

1 - storage tub (I got mine from The Dollar Store)
4 - boxes facial tissue (I used the rectangle boxes so I could stack on top of them)
120 pencils - I bought 8 boxes of 16ct pencils from The Dollar Store
4 - boxes of crayons
6 - glue sticks (You could probably do more like 10 but I only had 6)
4 - bottles of liquid glue
4 - bottles of hand sanitizer
1 - package pipe cleaners
2 - post it note pads
1 - roll poster board tape (sturdy double sided tape) - this is assembling the cake
1 - wall border
2 - packages lettering for bulletin boards
4 - packages of wall decorations
1 - package stickers

As for directions I kind of flew by the seat of my pants and didn't take many pictures. I can tell you that I used the boxes of facial tissue as my base. I needed the sturdiness of the boxes to hold the weight of everything above it. I was able to use the double sided tape to attach two boxes together on the sides and create 2 units and then attach the units together. I applied tape to top of one unit and pressed the other unit on top firmly to hold the pieces together (I would suggest you use a little more than you think you'll need). I attached the pencils by laying a piece of the poster board tape on the facial tissue box and sticking them on - to double secure them I ran a line of tape along the bottom of the row of pencils. Don't worry about seeing it because you can cover the tape up with the wall border. I think you can figure out the rest of the construction - just remember to be liberal with the poster board tape! :)

Alisha Pin It

Friday, May 4, 2012

Ashley - Mother's day wreath!

Hey Everyone! So I've been working on a mothers day project because I'm one proud mommy. So I took a few ideas off pinterest and combined them together and this is what I ended up with :)


So I made a basic tutu wreath with an 18in. wreath, if you don't know how look it up on pinterest. Then I picked up some wooden letters and some matching paint and I painted them. Then I used this tutorial to make the canvas with the picture on it. http://sarahsprojects.blogspot.com/2010/02/wall-art-for-siennas-room.html Then I just hot glued it all together :) Try it out!
Pin It

Thursday, May 3, 2012

Alisha - Granny Gone Wild Swap!

Introducing the:

Granny Gone Wild Swap!


I don’t know about everyone else but I’ve been in love with the granny square block since I first saw it. Now that I’ve made a few for bee mates I’m hooked! I have to have a quilt of my own and I thought it would be fun to host a swap and let everyone else enjoy too!

Who else has been in a bunch of the charm swaps? I know I’ve been in more than I can count and I have left over charms that I would love to use for this project. Since we’ll be using 2.5” squares it would be perfect for those stray charms! Are you ready to join in??!

Here’s the low down:

• We will be swapping blocks 1:1 in a rainbow of colors.
• Please use Kona White (not snow but white) for uniformity.
• Please use one color value for the inner ring and one color value for the center and outer ring. For example: aqua for the center and outer ring and red for the inner ring.
• Please only use designer label/modern (within the last 5 years) cotton quilting fabric found at your LQS (no Joanns, Handcock, or vintage/granny stash (sorry Granny!).
• Please use the tutorial found here: blueelephantstitches.blogspot.com/2012/01/granny-square-q...
• The tutorial calls for a finished block of 9 1/8” square so that’s what we will shoot for. Pressing seams in the direction called for in the tutorial is very important so please try to follow it the best you can.
• Before mailing place your finished blocks in a Ziploc bag with an index card with your information on it (Name, flickr name, address and block count).
• Please include a self addressed stamped envelope for me to return your blocks. If you’re using priority flat rate I have the bubble envelopes ($5.30 to ship) so you won’t need to send one (more room for blocks that way!) only return postage would be necessary (placing it in the bag with the blocks is fine).
• I’m going to be a stickler for square blocks with modern fabrics – unfortunately I’ve found that in past swaps some blocks are far smaller than the given size or with vintage fabric and I wasn’t able to use them in my quilt tops. In the event this happens (I know you ladies probably won’t have this issue) I’ll send your blocks back to you with any I was able to swap. I want everyone to get blocks back they are happy with and can use.


International swapper are welcome and are ship by date is June 30th!


Please come join us on flickr - we'd love to have more participants! Grab our swap button in the side bar and let's get sewing!


Pin It