You will need:
Enough fabric to reach all the way around your window
1in. white grosgrain ribbon
Black and pink felt
Valance rods
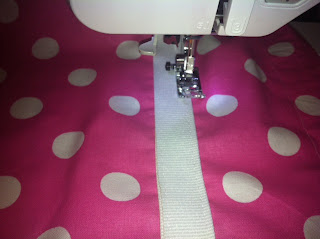
First I took my fabric and cut it down to 15in X 84in. I then folded both ends, pressed it and started sewing. Quick tip if you use fabric like this the polka dots will help you line things up and will help you sew straight lines so watch the polka dots!
After I got the edges done I moved onto the ribbon. When I sewed the ribbon on I loosened the tension a bit (between 2 and 3) and made my stitches longer.
When I was done with that I moved to the next step, the Minnie head. Cut out your Minnie head of your black felt. I left the stitches long and just switched out my top bobbin to to black thread. Sew on your Minnie head.
And for the cherry on top, the bow. Get your pink felt and cut out the shape of a bow. Now with my bow since the head was sewn on all I did was glue the bow to the black felt of the Minnie head just to make it easier and since it's going to be just hanging you can cheat lol.
I had my husband put the valance rod up for me while I was finishing up and boom!
You have an amazing looking party decoration that you can move into your princesses room after the party is over :)
Enjoy!
Pin It
.jpeg)
.jpeg)
.jpeg)


.jpeg)
.jpeg)
.jpeg)

No comments:
Post a Comment